Creating Realistic Holiday Animations for Families
July 8, 2026
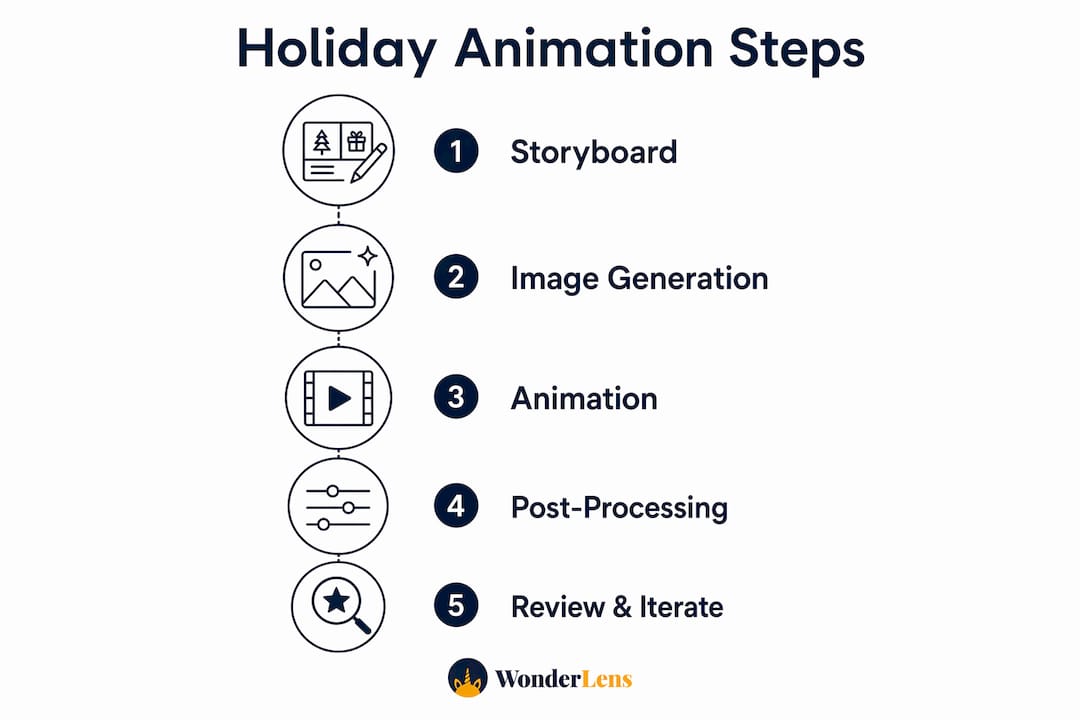
Creating realistic holiday animations is the process of combining cinematic planning, AI-powered image generation, controlled motion, and post-processing to produce lifelike holiday videos your family will treasure. This is also called AI cinematic animation in professional production circles. The result goes far beyond a simple photo filter. When done right, your living room becomes the stage, and Santa, a fairy, or a glowing dragon feels like it truly belongs there. This guide walks you through every step, from storyboarding your first scene to adding the final golden glow that makes the whole thing feel real.
What essential tools do you need for creating realistic holiday animations?
The right tools set the quality ceiling for your entire project. A four-step production pipeline covers storyboarding, image generation, animation, and post-processing. Each step requires a different type of tool, and choosing well at the start saves hours of frustration later.
Image generation
AI image generators produce the photorealistic base frames your animation needs. Look for tools that support detailed scene descriptions and allow you to specify lighting style, camera angle, and texture. Detailed scene descriptions with realistic lighting can produce results indistinguishable from traditional lifestyle photography. That means your Santa or fairy can look like it was photographed in your actual home.
Animation and motion tools
Image-to-video tools take your still frames and apply gentle, controlled motion. The best options for families offer simple controls, short render times, and output formats that work on phones and social media. Avoid tools that default to dramatic, sweeping motion. Subtle movement is the goal.
Post-processing software
Post-processing tools handle color grading and film grain. Free options like DaVinci Resolve offer professional-grade color tools at no cost. Paid apps like Adobe Premiere Pro add more control over grain and light adjustments. Either works well for family holiday projects.
Here is a quick comparison of tool categories by skill level:
| Tool category | Best for | Skill level needed |
|---|---|---|
| AI image generators | Creating base frames | Beginner |
| Image-to-video apps | Adding gentle motion | Beginner to intermediate |
| Color grading software | Final polish and warmth | Intermediate |
| Film grain plugins | Removing synthetic look | Intermediate |
Pro Tip: Start with one tool per category before adding more. Mastering a simple workflow produces better results than juggling five apps at once.
How do you storyboard and plan your holiday animation?
Skipping storyboarding leads to random, less believable footage. Planning every shot with defined lighting, mood, and framing is the single most important step for realism. Think of it as writing a short script before you pick up a camera.
Follow these steps to plan your animation:
- Define your narrative arc. Decide what story the animation tells. Is Santa placing a gift under your tree? Is a fairy landing on your windowsill? A clear story keeps every shot purposeful.
- Sketch your shots. You do not need artistic skill. Simple boxes with arrows showing camera direction are enough. Note whether each shot is wide, medium, or close.
- Choose your lighting style. Warm candlelight and soft lamp glow feel cozy and real. Harsh or flat lighting reads as artificial. Decide on your light source before generating any images.
- Build a character reference sheet. Collect or generate two to three reference images of your character from different angles. This keeps Santa's coat the same shade of red in every frame.
- List your atmospheric cues. Subtle holiday cues like warm lights and cozy textures work better than obvious icons. A glowing fireplace or a softly lit tree branch adds festive feeling without looking like a greeting card.
Pro Tip: Photograph your actual room before generating any AI images. Use that photo as a lighting reference so your AI-generated character catches the same light your furniture does.
Emotional impact comes from the story, not the special effects. Holiday visuals that capture emotional moments like a character reaching toward a child's stocking convey warmth far more powerfully than a character simply standing still. Plan at least one moment of action or interaction in your sequence.
What techniques ensure photo-realistic image generation and animation?
Photorealism in AI animation depends on the quality of your prompts and the restraint of your motion. Clear, high-resolution source images set the quality ceiling. Poor base images cannot be rescued by animation alone. Start sharp, and your final video stays sharp.
Use these techniques when generating your base images:
- Specify lighting in every prompt. Write "warm side lighting from a fireplace" rather than just "Christmas scene." Specific lighting instructions produce natural shadows and depth.
- Request cinematic camera angles. Phrases like "eye-level shot" or "slight low angle" tell the AI how to frame the character, which affects how real it looks in your space.
- Describe texture explicitly. "Velvet coat with visible fabric weave" produces richer results than "red coat." Texture is what separates a realistic image from a cartoon.
- Use your room photo as a reference. Many AI image tools accept a reference image. Upload your room photo so the generator matches your actual lighting and color palette.
For the animation step, restraint is everything. Over-animating shots with dramatic motion causes an uncanny valley effect. The uncanny valley is the unsettling feeling you get when something almost looks real but does not quite make it. Subtle movements solve this.
| Motion type | Realistic effect | Avoid |
|---|---|---|
| Gentle camera drift | Mimics handheld camera | Fast zoom or spin |
| Slight head turn | Natural character presence | Full body rotation |
| Flickering light | Authentic atmosphere | Strobe or pulsing light |
| Soft breath movement | Living, believable character | Exaggerated bounce |
Wonderlens applies exactly this kind of controlled, AI-driven animation to place holiday characters inside your actual home environment, with shadow casting and lighting matched to your room.
How do you apply post-processing to enhance realism?
Post-processing is where good animations become great ones. A light layer of film grain and careful color grading adds the imperfection that real cameras produce. Skipping these steps leaves footage looking too clean and obviously digital.
Apply these finishing techniques in order:
- Color grade for warmth first. Shift your whites slightly toward amber and your shadows toward deep blue. This mimics the look of indoor holiday lighting and makes every frame feel cozy.
- Add film grain last. Apply a subtle grain layer at 10%–20% opacity. Too much grain looks like a damaged tape. Too little leaves the digital smoothness intact.
- Match grain across all shots. Use the same grain preset on every clip so the sequence feels like one continuous video, not a collection of separate clips.
- Adjust exposure shot by shot. AI-generated frames sometimes vary in brightness. A quick exposure correction on each clip before grading keeps the sequence consistent.
Common post-processing mistakes that break realism include over-saturating colors, applying grain unevenly, and skipping shadow adjustments. A character that casts no shadow on your floor will never look like it belongs there. Shadow grounding is the single most overlooked step in family holiday animation projects.
Pro Tip: Export a short 3-second test clip before rendering the full video. Watch it on your phone, not just your computer screen. Phones show color and grain differently, and that is where your family will watch it.
What common challenges arise and how do you fix them?
Every family animation project hits a wall at some point. Knowing the most common problems in advance means you fix them in minutes instead of hours.
- Weak source images. If your base image looks flat or blurry, no amount of animation fixes it. Regenerate with a more detailed prompt and higher resolution settings before moving forward.
- Inconsistent character appearance. If Santa's beard changes length between shots, your character sheet was not specific enough. Maintaining subject consistency across frames prevents jarring shifts that break immersion. Regenerate problem frames using your reference images as a guide.
- Unnatural motion artifacts. Warping faces or melting hands are signs of too much motion applied to a complex area. Reduce the motion intensity and restrict animation to background elements like light flicker or a gentle camera drift.
- Overly clean synthetic look. If the video still looks digital after grading, increase your film grain slightly and add a very soft vignette around the edges. This mimics lens behavior and pulls the eye toward the center of the frame.
Testing multiple animation variations while changing one variable at a time improves final quality and helps identify the most realistic results. Changing everything at once makes it impossible to know what actually worked.
The most reliable fix for almost any realism problem is iteration. A repeatable creative loop of storyboard, generate, animate, review, and revise produces stronger videos with every pass. Treat your first version as a draft, not a final product.
Key Takeaways
Creating realistic holiday animations requires a disciplined four-step pipeline: storyboard your shots, generate high-quality base images, apply subtle motion, and finish with film grain and color grading.
| Point | Details |
|---|---|
| Storyboard before you generate | Plan lighting, framing, and character details before touching any AI tool. |
| Source image quality is the ceiling | High-resolution, well-lit base images determine how realistic your final video looks. |
| Restraint in motion creates realism | Gentle camera drifts and small head turns feel more natural than dramatic movement. |
| Post-processing removes the digital look | Film grain and warm color grading make AI footage feel like it came from a real camera. |
| Iterate one variable at a time | Changing one element per test helps you identify exactly what improves realism. |
What I have learned about holiday animation and why subtlety wins
After spending time studying how families use AI animation tools for holiday projects, one pattern stands out clearly. The families who get the most emotional response from their videos are not the ones using the most dramatic effects. They are the ones who planned the most carefully.
The conventional wisdom says better tools equal better results. That is only half true. A well-planned scene with a clear story, consistent character design, and warm lighting will outperform a technically complex animation that has no emotional center. Every time.
The subtlety principle also applies to holiday iconography. Leaning on obvious symbols like giant candy canes or flashing lights makes an animation feel like a greeting card. A character that catches the same golden glow as your actual lamp, casts a shadow on your actual floor, and moves with the quiet confidence of something that belongs there. That is what makes a child's jaw drop.
The importance of realism in holiday animations is not about technical perfection. It is about believability. And believability comes from thoughtful planning, not from the most expensive software. Start simple, plan well, and let the magic come from the story you tell.
— Jeremiha
Wonderlens makes holiday animation magic accessible for every family
Families who want the warmth and wonder of a realistic holiday animation without a steep learning curve have a clear starting point.

Wonderlens is a web-based platform built exactly for this. You upload a photo of your home, and Wonderlens places a cinematic holiday character, whether Santa, a fairy, or a glowing dragon, directly into your space. The AI matches your room's lighting, casts real shadows, and produces a shareable 10-second video your kids will ask to watch again and again. Credits start at $1.99, and the whole process takes minutes. Wonderlens also offers creative animation steps to help you get the most out of every scene you create.
FAQ
What is the most important step in creating realistic holiday animations?
Storyboarding is the most critical step. Planning your lighting, framing, and character details before generating any images prevents inconsistency and produces far more believable results.
How do I avoid the uncanny valley in holiday animations?
Restrict motion to subtle movements like gentle camera drifts, slight head turns, and flickering light. Over-animating faces and bodies triggers the uncanny valley effect and breaks realism immediately.
What post-processing techniques improve holiday animation realism?
Apply warm color grading first, then add a light film grain layer at low opacity. These two steps mimic real camera behavior and remove the digital smoothness that makes AI footage look synthetic.
Do I need expensive software to create realistic holiday animations?
No. Free tools like DaVinci Resolve handle color grading at a professional level. The quality of your source images and the care of your planning matter far more than the price of your software.
How does Wonderlens simplify the holiday animation process for families?
Wonderlens handles the AI rendering, lighting matching, and shadow casting automatically. You upload a home photo, choose a character, and receive a cinematic holiday video without any technical setup.
Recommended
- Creative photo animation steps for magical family memories — WonderLens | WonderLens
- Magical home animation types to enchant your holidays — WonderLens | WonderLens
- Why animated photos make holiday memories more magical — WonderLens | WonderLens
- Examples of Animated Holiday Keepsakes for Families — WonderLens | WonderLens