Photo to Video Transformation Guide for Families
May 31, 2026
Photo to video transformation is the process of converting still images into short, dynamic video clips using AI tools that add realistic motion and cinematic effects. Platforms like Adobe Firefly, Canva, and Google Photos have made this technology accessible to anyone with a smartphone photo library. The industry term for this process is "image-to-video generation," and it works by having AI estimate depth and physics from your original photo, then render new motion frames around it. For families, this means a birthday snapshot, a holiday morning, or a quiet backyard moment can become a living memory worth watching again and again. This photo to video transformation guide walks you through everything you need to get started.
What are the photo and video requirements for successful transformation?
Image quality is the single largest factor determining how good your final animated video looks. A blurry or poorly lit photo gives the AI very little to work with, and the result will show it. Start with the best source material you have.
Here is what makes a photo work well for AI animation:
- Resolution: Higher is better. Canva requires a minimum of 256x224 pixels for its image-to-video tool, but aim for at least 1080p for smooth, sharp results.
- Lighting: Natural light or well-balanced indoor lighting produces cleaner depth maps for the AI to read.
- Subject clarity: A clear subject with visible separation from the background helps the AI understand what to move and what to keep still.
- Implied motion: Photos with flowing fabric, falling leaves, or splashing water give the AI natural cues for realistic animation.
- Composition: Simple, uncluttered backgrounds produce cleaner animations with fewer artifacts.
Video output also has specific requirements worth knowing before you start.
| Setting | Typical value | Best use case |
|---|---|---|
| Output format | MP4 | Universal sharing and editing |
| Clip duration | 3 to 10 seconds | Social posts, loops, memory reels |
| Aspect ratio (Stories) | 9:16 | Instagram, TikTok, Facebook Stories |
| Aspect ratio (YouTube) | 16:9 | YouTube, desktop playback |
| Aspect ratio (square) | 1:1 | Instagram feed, Facebook feed |
AI video tools typically generate clips between 3 and 10 seconds long. This is not a limitation so much as a design choice. Short clips are perfect for social media loops, memory montages, and holiday keepsakes.
Pro Tip: Pick photos where something in the frame looks like it wants to move. A child mid-laugh, a candle flame, or a flag in the wind will animate far more naturally than a flat, static portrait against a plain wall.
How to choose and use AI tools for photo to video transformation
Several platforms handle image-to-video conversion well, and each has a different feel depending on your goals.
| Tool | Clip length | Ease of use | Best for |
|---|---|---|---|
| Adobe Firefly | Variable | Moderate | Creative control, cinematic quality |
| Canva | 5 seconds fixed | Very easy | Quick social clips, beginners |
| Google Photos | 6 seconds fixed | Very easy | Fast sharing, casual memories |
| Runway | Variable | Advanced | Professional-grade animation |
Google Photos animates photos into 6-second videos using simple prompts like "Subtle movements," making it the fastest option for casual family use. Canva produces 5-second clips with a drag-and-drop interface that requires no technical knowledge. Adobe Firefly gives you more creative control over motion style and duration, which suits parents who want a more polished result. Runway is the most powerful option but has a steeper learning curve.
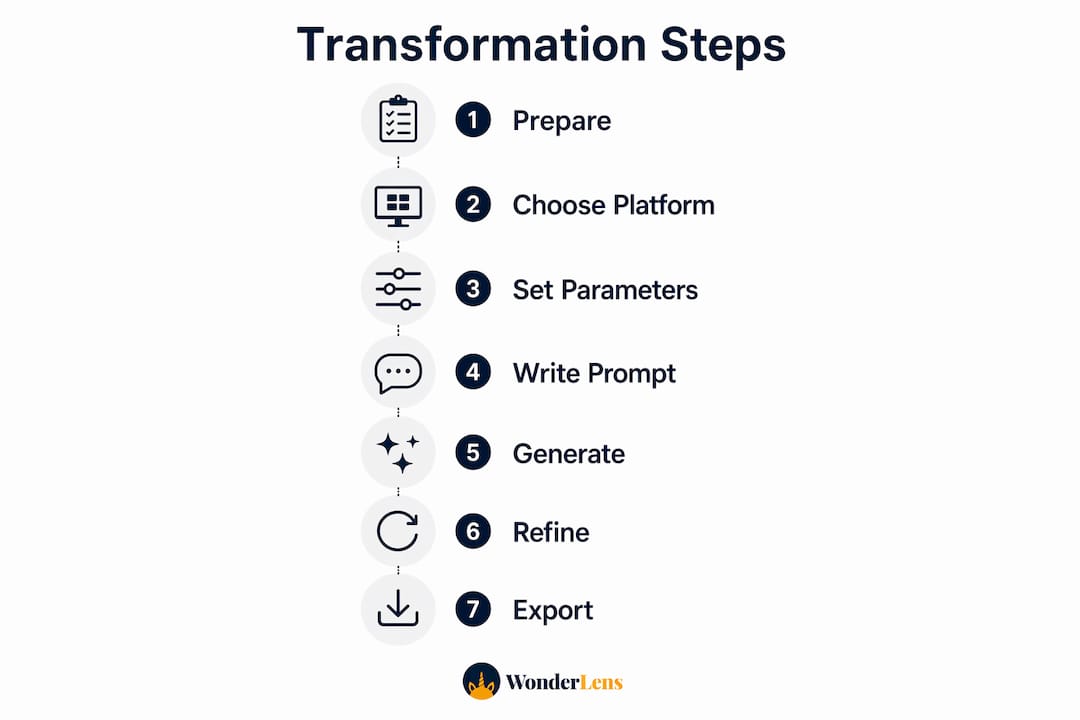
Here is a step-by-step process that works across most platforms:
- Select your photo. Choose a high-resolution image with good lighting and a clear subject. Crop or edit it in advance if needed.
- Upload to your chosen platform. Most tools accept JPEG and PNG files. Drag and drop directly into the editor.
- Set your output parameters. Choose aspect ratio based on where you plan to share the video. Select duration if the tool allows it.
- Write or select a motion prompt. This is where you describe how you want the scene to move. More on this in the next section.
- Generate and review. Most tools produce a result in under one minute. Watch it through and decide if it needs refinement.
- Iterate if needed. Adjust your prompt and regenerate. Two to four attempts is normal before landing on a result you love.
- Export and share. Download as MP4 and post directly to social media or save to your family photo library.
Testing two or three tools on the same photo is worth the time. The same image can produce very different results depending on the platform's AI model, and you will quickly find which one matches your style.
How do you write effective motion prompts for better animation?
The biggest mistake most people make with motion prompts is describing what the photo looks like instead of how it should move. Expert prompts focus almost entirely on camera motion and subject behavior, not on the visual content already visible in the image.
Think of your prompt as directions to a camera operator, not a description of the scene. Here is what that looks like in practice:
- Weak prompt: "A cozy living room with warm lighting and a Christmas tree."
- Strong prompt: "Slow camera pan right, gentle zoom-in over 5 seconds, candle flames flicker softly."
The strong version tells the AI exactly what to do. The weak version just restates what is already in the photo. Effective motion prompts specify direction, speed, and timing to get predictable, usable results.
More tips for writing prompts that work:
- Use specific directional language: "pan left," "zoom out," "tilt up."
- Add speed descriptors: "slow," "gentle," "gradual."
- Limit each prompt to one or two simultaneous motions. Asking for a pan, a zoom, and a subject movement all at once usually produces chaotic results.
- Avoid vague mood words like "magical" or "dreamy" as standalone instructions. They give the AI nothing concrete to act on.
- Describe subject-specific motion when relevant: "leaves rustle gently," "hair moves in a light breeze," "child's eyes blink slowly."
Professional workflows expect 2 to 4 iterations before landing on a final video. Do not treat the first generation as the finished product. Adjust one element of your prompt at a time so you can track what changed and why.
Pro Tip: Save your best-performing prompts in a notes app. Once you find a formula that works for a particular type of photo, like a portrait or a landscape, you can reuse it across your whole family album.
Step-by-step guide to transforming your photos into videos
This workflow brings together everything above into a repeatable process you can use on any photo.
Step 1: Prepare your image. Open the photo in a basic editor like Google Photos or Apple Photos. Adjust brightness and contrast if needed. Crop to your target aspect ratio before uploading to save time later.
Step 2: Choose your platform. For quick family memories, start with Google Photos or Canva. For more control over the final look, try Adobe Firefly. Upload your prepared image and create a new project.
Step 3: Set output parameters. Select your aspect ratio (9:16 for phone-first sharing, 16:9 for a TV or YouTube feel). If the platform lets you choose duration, 5 to 8 seconds is the sweet spot for social sharing.
Step 4: Write your motion prompt. Focus on camera movement and one or two subject motions. Keep it under 20 words. Example: "Gentle zoom-in, soft light flicker, child smiles slowly."
Step 5: Generate and review. Watch the clip from start to finish. Look for unnatural warping, flickering edges, or motion that feels wrong. Note specifically what you want to change.
Step 6: Refine and regenerate. Adjust one part of your prompt and generate again. Repeat up to four times if needed. Most users need multiple iterations to remove artifacts and get smooth motion.
Step 7: Export and share. Download as MP4. For a longer memory reel, combine multiple clips using a free editor like CapCut or iMovie. Share directly to Instagram, TikTok, or save to your family drive.
Here is a quick reference for the full workflow:
| Step | Action | Tool suggestion |
|---|---|---|
| Prepare image | Crop, adjust brightness | Google Photos, Apple Photos |
| Upload and set parameters | Aspect ratio, duration | Canva, Adobe Firefly |
| Write motion prompt | Camera direction, subject motion | Any platform |
| Generate and review | Watch for artifacts | Platform preview |
| Export | Download MP4 | Platform export |
Troubleshooting common issues and tips for enhancing video quality
Even with a great photo and a solid prompt, things can go wrong. Blurry or artifacted input images do not just produce mediocre videos. They often produce uncanny, distorted ones where the AI amplifies every imperfection. Fix the source photo first before blaming the tool.
Common problems and how to handle them:
- Warping faces or limbs: Reduce the intensity of subject motion in your prompt. Switch to camera-only movement like a slow pan or zoom.
- Flickering edges: This usually means the AI is struggling with a busy background. Try a version of the photo with a simpler background, or use a portrait mode shot with natural blur.
- Abrupt video cuts: Some platforms cut motion sharply at the end of the clip. Add "smooth fade out" to your prompt or trim the last half-second in a video editor.
- Unnatural water or fabric movement: Add specific descriptors like "gentle ripple" or "soft fabric sway" rather than leaving motion open-ended.
- Flat, lifeless animation: Your photo may lack depth cues. Try a photo with a clear foreground and background separation.
Pro Tip: For longer family memory videos, generate 4 to 6 short clips from different photos and stitch them together in CapCut or iMovie. Add a music track and you have a shareable memory reel that feels like a real short film.
The video-first shift on platforms like TikTok and Instagram means animated photo memories now get far more engagement than static posts. Families who learn this workflow today are building a skill that will only become more valuable as AI tools improve.
Key takeaways
Photo to video transformation works best when you combine high-quality source images, platform-specific settings, and motion-focused prompts refined over two to four generations.
| Point | Details |
|---|---|
| Image quality comes first | High-resolution, well-lit photos with clear subjects produce the best AI animation results. |
| Match platform to your goal | Canva and Google Photos suit quick sharing; Adobe Firefly suits more polished, creative results. |
| Prompt for motion, not content | Describe camera direction and speed rather than restating what is already visible in the photo. |
| Expect iteration | Two to four prompt refinements is normal before reaching a final video worth keeping. |
| Short clips are the format | Most AI tools generate 3 to 10 second clips. Combine multiple clips for longer memory reels. |
Why AI photo animation changed how I think about family memories
I spent years treating family photos as something to organize and store. Thousands of images sitting in folders, rarely revisited. What shifted my thinking was watching a single photo of my daughter at age four, standing in front of a Christmas tree, come to life with a slow zoom and a gentle flicker of the lights behind her. She watched it on repeat for twenty minutes.
That reaction told me something the technology itself does not advertise. The value is not in the animation. It is in the emotional weight that motion adds to a moment you thought was already captured. A still photo says "this happened." A short animated clip says "you were there."
What I have learned from working with these tools is that the image-to-video approach is genuinely superior to text-to-video for family memories, because your photo is the anchor. The AI is not inventing a scene. It is extending one you already lived. That distinction matters enormously when the subject is your child's face or a moment that cannot be recreated.
My honest advice: do not wait for the perfect photo or the perfect tool. Start with what you have. The first few attempts will be imperfect, and that is fine. The process of learning what works for your specific photos is itself part of building a creative habit that will serve your family for years. You can explore more ideas on AI photo animation and find inspiration for your next project.
— Jeremiha
Bring your family photos to life with Wonderlens
Wonderlens is built specifically for families who want to create magical, shareable video memories without needing any technical skills. Upload a photo of your living room and watch Santa walk through it on Christmas morning, or see a unicorn trot across your backyard on a spring afternoon. The platform handles lighting, shadows, and movement automatically so every video looks cinematic and real.
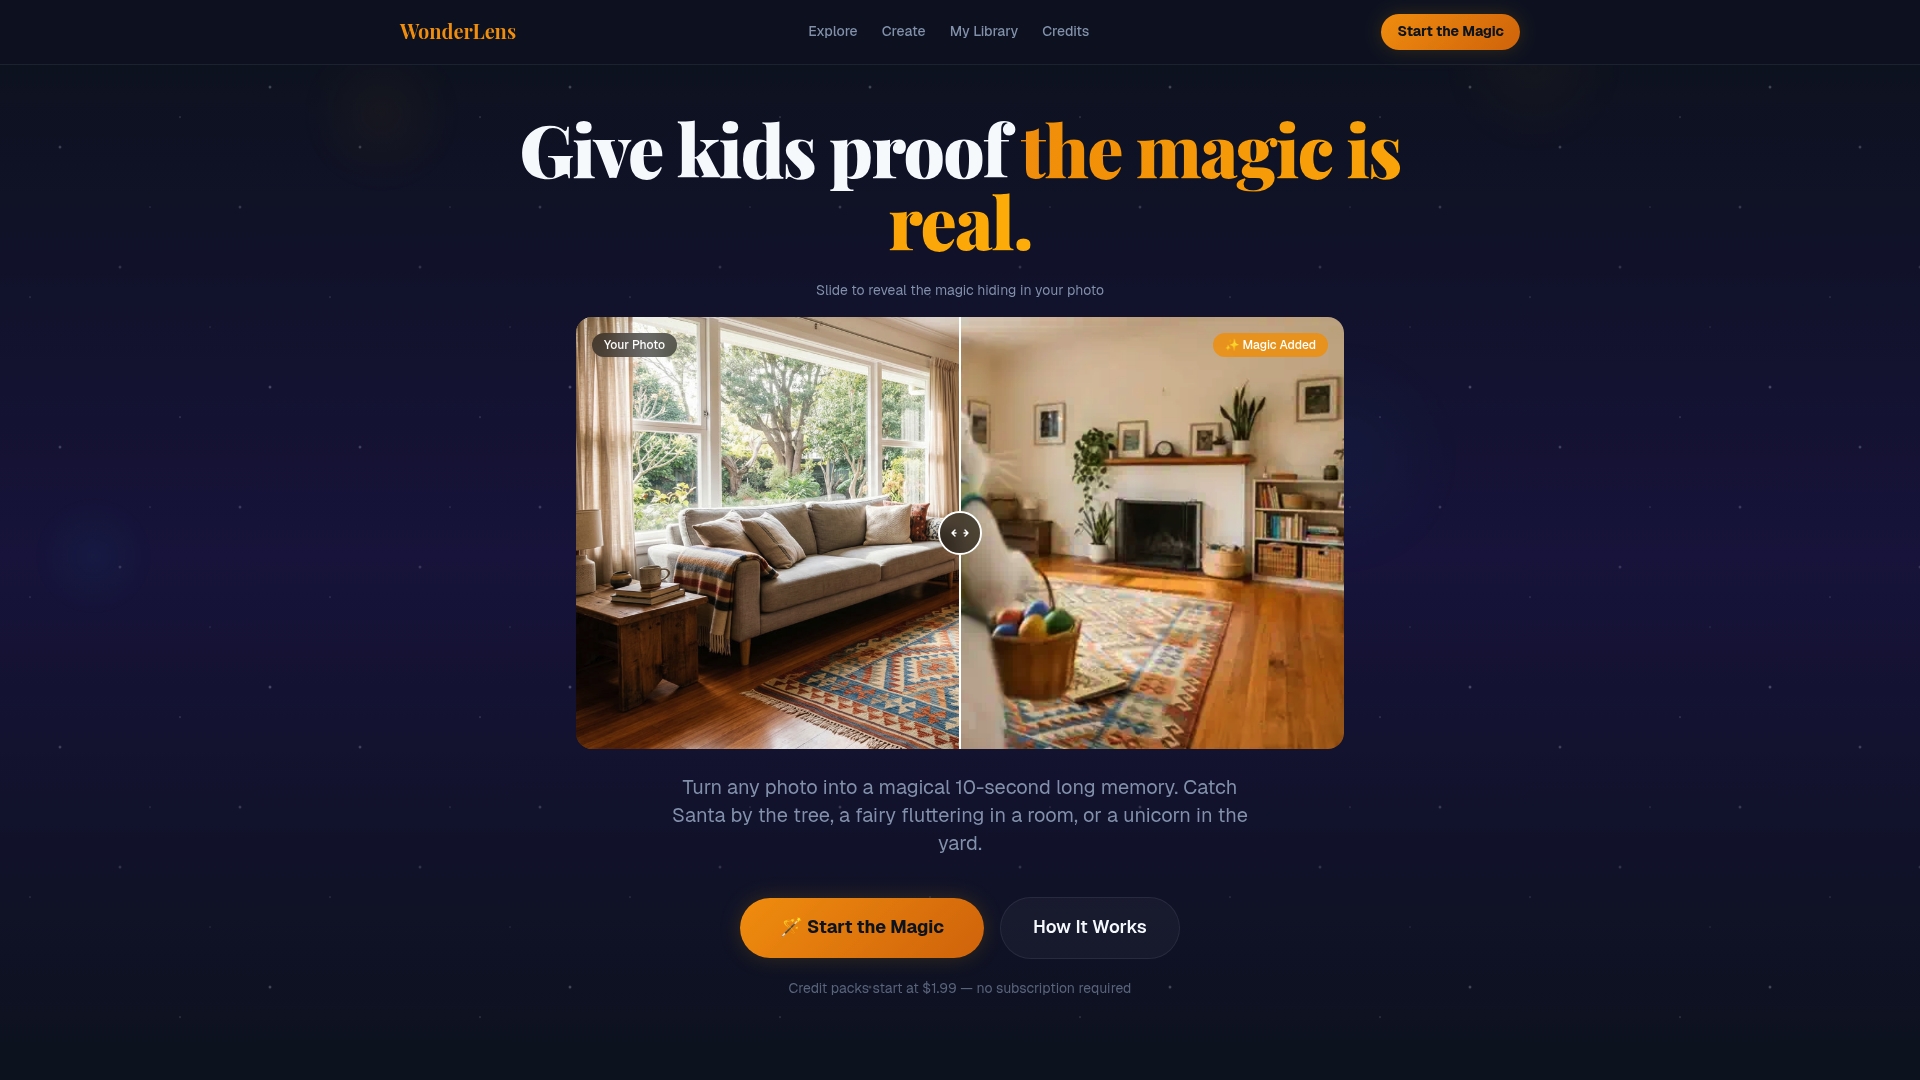
Wonderlens videos run 10 seconds and are ready to share instantly. Credits start at $1.99, making it one of the most accessible ways to create magical family videos from your existing photos. If you want to see what the full creative process looks like before you start, the Wonderlens blog has step-by-step inspiration for every occasion.
FAQ
What is photo-to-video transformation?
Photo-to-video transformation is the process of using AI to convert a still image into a short animated video clip. The AI estimates depth and motion from the original photo, then generates new frames that make the scene appear to move.
What image resolution do I need to convert photos to video?
Most platforms require a minimum resolution to produce quality results. Canva requires at least 256x224 pixels, but 1080p or higher produces noticeably sharper and smoother animated videos.
How long are AI-generated photo videos?
Most AI image-to-video tools generate clips between 3 and 10 seconds long. Google Photos produces 6-second videos, while Canva outputs 5-second clips. For longer memory reels, combine multiple clips in a video editor.
How many prompt attempts does it take to get a good result?
Expect two to four prompt iterations before reaching a final video you are happy with. Adjust one element at a time, focusing on camera direction and speed, to track what each change produces.
What is the best format to export photo videos for sharing?
MP4 is the standard output format across all major platforms and works universally for social media, messaging apps, and personal storage. Use 9:16 aspect ratio for Instagram and TikTok Stories, and 16:9 for YouTube or desktop viewing.
Recommended
- Animated photo transformation: bring family memories to life — WonderLens | WonderLens
- Why Use Video over Photo Editing for Memories — WonderLens | WonderLens
- Creative photo animation steps for magical family memories — WonderLens | WonderLens
- Create Cinematic Digital Memories for Kids: A Parent's Guide — WonderLens | WonderLens